Firmware reverse engineering and analysis of router devices
Firmware reverse engineering and analysis of router devices
Intro
First of all, hello everyone. We’re here to discuss routers, which are essential devices in our lives. Probably, more people don’t even know what it is. I have always been interested in security. How secure are they? In this post, I will discuss the feasibility of extracting the firmware and attempting to reverse it. Believe me, it is more interesting. In the market, there are routers from high-profile enterprises like Fortinet to budget home brands like TP-Link and Tenda, as well as other Chinese brands.
What is the overall router?
A router is a complete device that directs network traffic between networks, most commonly between your home network and the internet. It combines several essential functions into one physical unit: routing data packets, providing wired and wireless connectivity, managing network security, and assigning IP addresses to devices. In everyday use, the router acts as the central hub, keeping all your devices connected and ensuring that information is sent to the right place efficiently and securely.
Bootloader, Kernel, and Root Filesystem
Router firmware is usually built from three fundamental components that work together to boot the device and provide all network functionality. Understanding these layers is essential for analyzing or reverse-engineering any embedded system.
1. Bootloader
The bootloader is the first piece of code to run when the router powers on. In most consumer routers, this is U-Boot, a lightweight and highly configurable embedded boot manager. Its responsibilities include:
- Initializing the CPU, RAM, flash, and essential peripherals
- Loading the Linux kernel from flash storage
- Providing a recovery or failsafe console over the UART
- Verifying firmware integrity, sometimes with signatures
- Exposing environment variables that control boot parameters
The bootloader prepares the hardware and hands control over to the operating system.
2. Kernel
Routers typically run a stripped-down Linux kernel on architectures such as MIPS, ARM, and Qualcomm Atheros SoCs. The kernel includes:
- Drivers for Ethernet switches, Wi-Fi radios, USB, and flash memory
- Filesystem support (SquashFS, JFFS2, UBIFS)
- Networking stacks (iptables, bridge, VLAN, NAT, QoS)
- Device-specific patches applied by manufacturers
Vendors often customize the kernel with proprietary wireless drivers or SoC-specific code, making kernel extraction and decompilation one of the most critical parts of firmware analysis.
3. Root Filesystem (RootFS)
The root filesystem contains everything the router needs to operate once the kernel starts. It usually includes:
/bin,/sbin,/usr/bin,/usr/sbin- system utilities and command-line tools- Init scripts that control the boot process
- The web administration interface (HTML, CGI binaries, Lua, PHP, etc.)
- Configuration files such as network settings, firewall rules, and Wi-Fi passwords
- BusyBox - a compact, multi-call binary replacing most core Linux tools
- Vendor daemons for DHCP, DNS, routing, and wireless
- Optional packages (VPN, parental controls, IPv6 services)
Most routers use SquashFS for the root filesystem because it is highly compressed and read-only. Writable data is stored separately in JFFS2 or overlay partitions.
Ways of Extracting Firmware From a Router
Extracting firmware from a router is often the first step in reverse engineering or vulnerability research. Depending on the device and level of protection, there are several practical methods ranging from simple downloads to hardware-level extraction.
Note: if you don’t have a toolkit to extract firmware from the hardware. No worries, in our test case, we use the vendor-provided firmware from the vendor’s website.
1. Downloading directly from the official website the firmware.
2. Intercept the firmware in the process of updating.
3. JTAG Access (Hardware-Level Firmware Extraction)
JTAG (Joint Test Action Group) allows low-level interaction with the CPU for debugging, halting execution, and reading memory/flash. Many routers expose a 10-pin or 14-pin JTAG header.
3.1. Hardware Required
- JTAG adapter (Bus Pirate, JTAGulator, FT2232H, Segger J-Link, OpenOCD-supported device)
- Soldered header pins on router PCB
- OpenOCD is installed on your host system
3.2. Detecting JTAG Pins
If pins aren’t labeled:
# Using JTAGulator to auto-detect TCK, TMS, TDI, TDO
jtagulator detectJTAG
You connect the probe to multiple pins; JTAGulator determines:
- TCK (Test Clock)
- TMS (Mode Select)
- TDI (Data In)
- TDO (Data Out)
3.3. Connecting via OpenOCD
Example OpenOCD interface configuration for Bus Pirate:
interface.cfg:
interface buspirate
buspirate_port /dev/ttyUSB0
buspirate_speed 115200
Target config (target.cfg):
source [find target/mips_m4k.cfg]
reset_config trst_and_srst
Run:
sudo openocd -f interface.cfg -f target.cfg
3.4 Dumping Flash via JTAG
Inside the OpenOCD telnet console:
telnet localhost 4444
Then dump memory:
# Halt CPU
halt

# Dump SPI flash-mapped memory (example address 0x1FC00000)
dump_image router_flash.bin 0x1FC00000 0x01000000
Where:
- 0x1FC00000 = typical flash base address for MIPS SoCs
- 0x01000000 = 16 MB size (adjust per router)
Store result:
dump_image bootloader.bin 0x1FC00000 0x00040000
You can now analyze the raw flash image.
4. SPI Flash Chip Dumping (Hardware-Level)
This uses a flash programmer to directly read/write the SPI NOR flash chip storing the firmware.
4.1. Tools
- CH341A USB SPI programmer
- SOIC8 clip (for in-circuit)
flashromutility
4.2. Identify Flash Chip
Router PCB will have something like:
- Winbond W25Q64FV
- Macronix MX25L128
- GD25Q64
4.3. Dumping Flash In-Circuit with SOIC Clip
Attach the SOIC clip to the chip with the router powered off.
Connect clip → CH341A → USB.
Run:
sudo flashrom -p ch341a_spi -r full_dump.bin
Verify:
sudo flashrom -p ch341a_spi -v full_dump.bin
If in-circuit access fails (due to voltage interference):
sudo flashrom -p ch341a_spi --noverify-all -r dump_partial.bin
If still bad: desolder the chip and read directly:
sudo flashrom -p ch341a_spi -r router_flash_raw.bin
4.4. Dumping Individual Flash Regions
After identifying partitions via binwalk:
binwalk -e firmware.bin
You might split manually:
dd if=full_dump.bin of=u-boot.bin bs=1 count=262144
dd if=full_dump.bin of=kernel.bin bs=1 skip=262144 count=2097152
5. UART / Serial Console Dump (Bootloader-Level)

UART provides access to the bootloader (e.g., U-Boot, RedBoot, CFE). Most routers expose UART pads: GND, TX, RX, (Sometimes VCC – but DO NOT connect VCC).
5.1. Connection
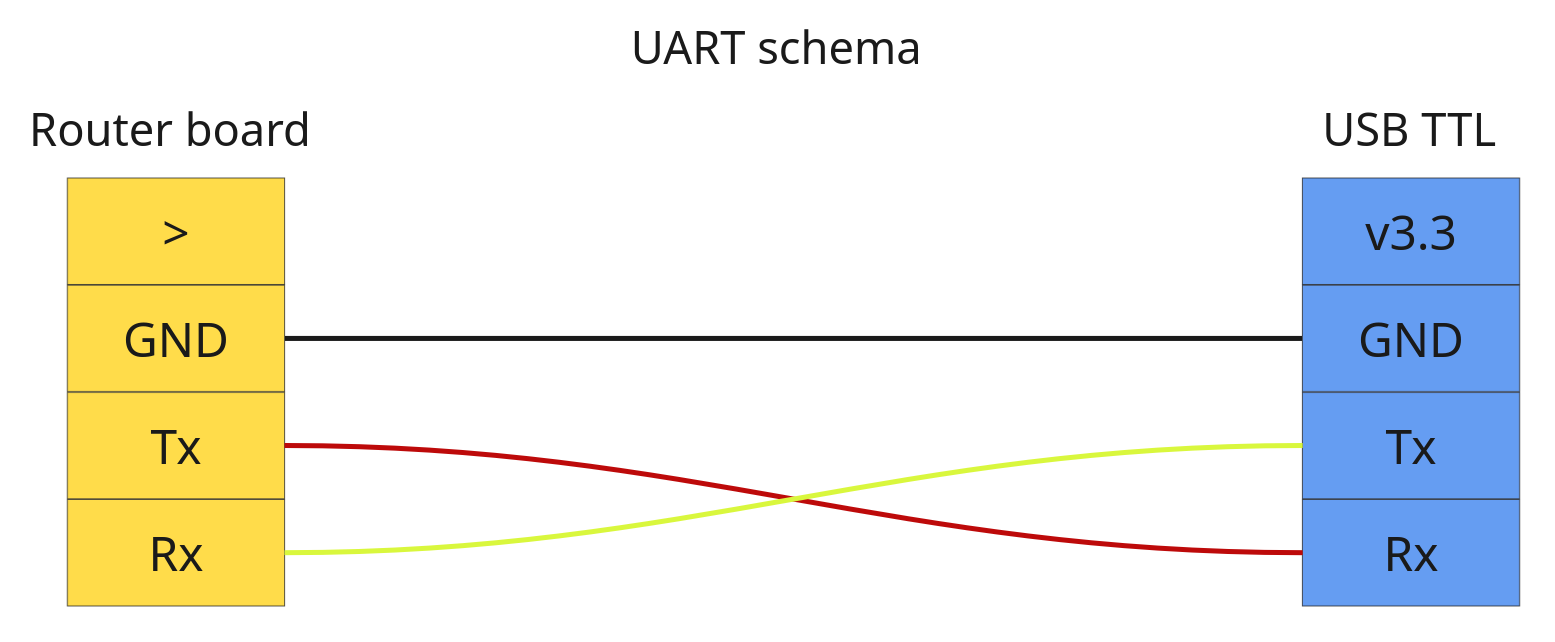
You should connect GND to GND, but Tx and Rx to the opposite pins.
Use:
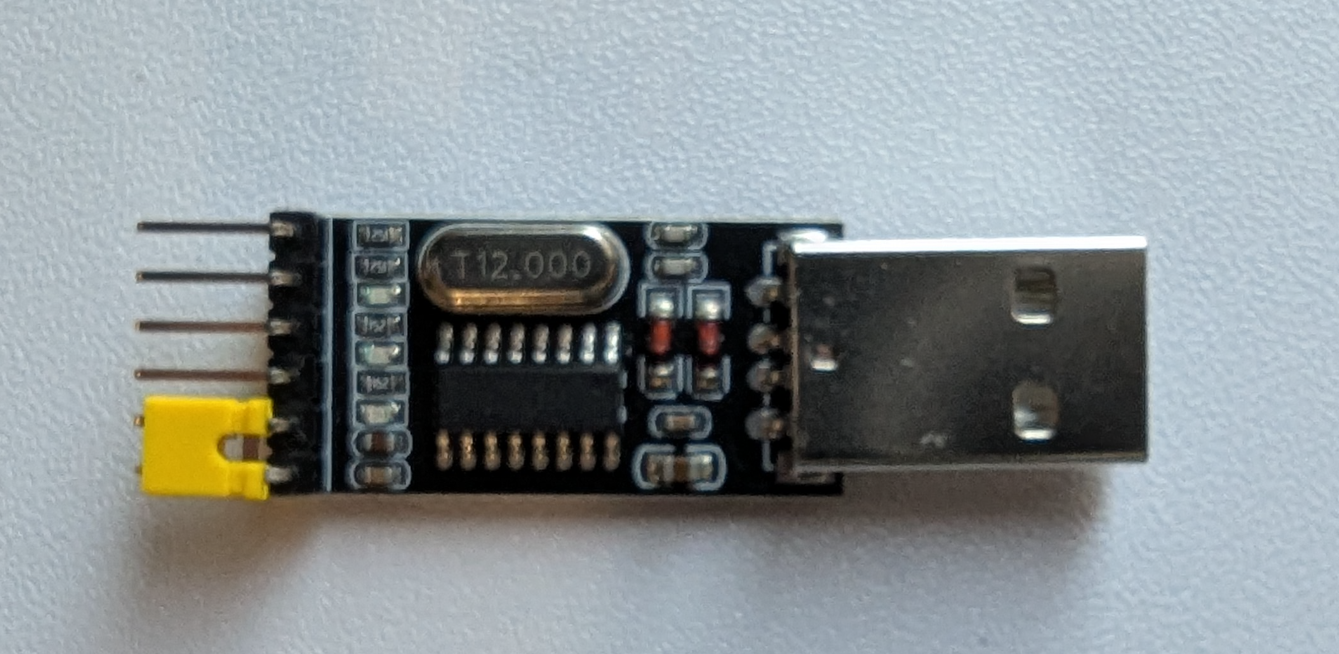
- USB–TTL adapter (FT232RL, CH340, CP2102)
- 115200 baud (most common)
Example:
screen /dev/ttyUSB0 115200
Or:
picocom /dev/ttyUSB0 -b 115200
Baud depends on the hardware; it may differ.
Press Ctrl+C or any key during boot to stop autoboot.
You’ll see something like:
U-Boot 1.1.4 (Jan 1 2010)
ar7240>
5.2. Dump Flash Using U-Boot Commands
Dumping Flash to RAM
Example reading 4MB from flash:
ar7240> nand read 0x81000000 0x000000 0x400000
0x81000000 = RAM buffer, 0x000000 = flash offset, 0x400000 = size (4MB).
Transfer Dump to Host via TFTP
Set up a TFTP server on your PC, then:
ar7240> setenv ipaddr 192.168.1.1
ar7240> setenv serverip 192.168.1.2
ar7240> tftp put 0x81000000 0x400000 flash_dump.bin
Dump Flash Page-by-Page
Some bootloaders lack full nand read, so you use a loop:
ar7240> md.b 0x1f000000 0x10000
5.3. Dump MTD Partitions via Linux Shell
If the router boots fully and offers a shell:
cat /proc/mtd
Example output:
mtd0: 00040000 00010000 "u-boot"
mtd1: 00200000 00010000 "kernel"
mtd2: 003c0000 00010000 "rootfs"
Dump partitions:
dd if=/dev/mtd0 of=u-boot.bin
dd if=/dev/mtd1 of=kernel.bin
dd if=/dev/mtd2 of=rootfs.bin
Or all at once:
dd if=/dev/mtdblock0 of=flash_complete.bin
Root Filesystem Inspection
If you downloaded from the official website of the vendor, it is easy to extract it with the command binwalk -e firmware.bin , we take as an example of TP-Link WR841N V14 250328 US firmware to clearly show how it indeed works.
After unzipping and recursive extraction into firmware.bin.extracted, we see multiple files of kernel
ls
100200.squashfs  10400  10400.7z  squashfs-root  squashfs-root-0
This is the extracted root filesystem from the SquashFS image. The unsquashfs tool creates this directory by default. It contains the actual Linux root filesystem tree:
/bin, /sbin, /etc,/www, /usr, etc.
This is the part you analyze to inspect scripts, web interface code, binaries, configs, passwords, etc.
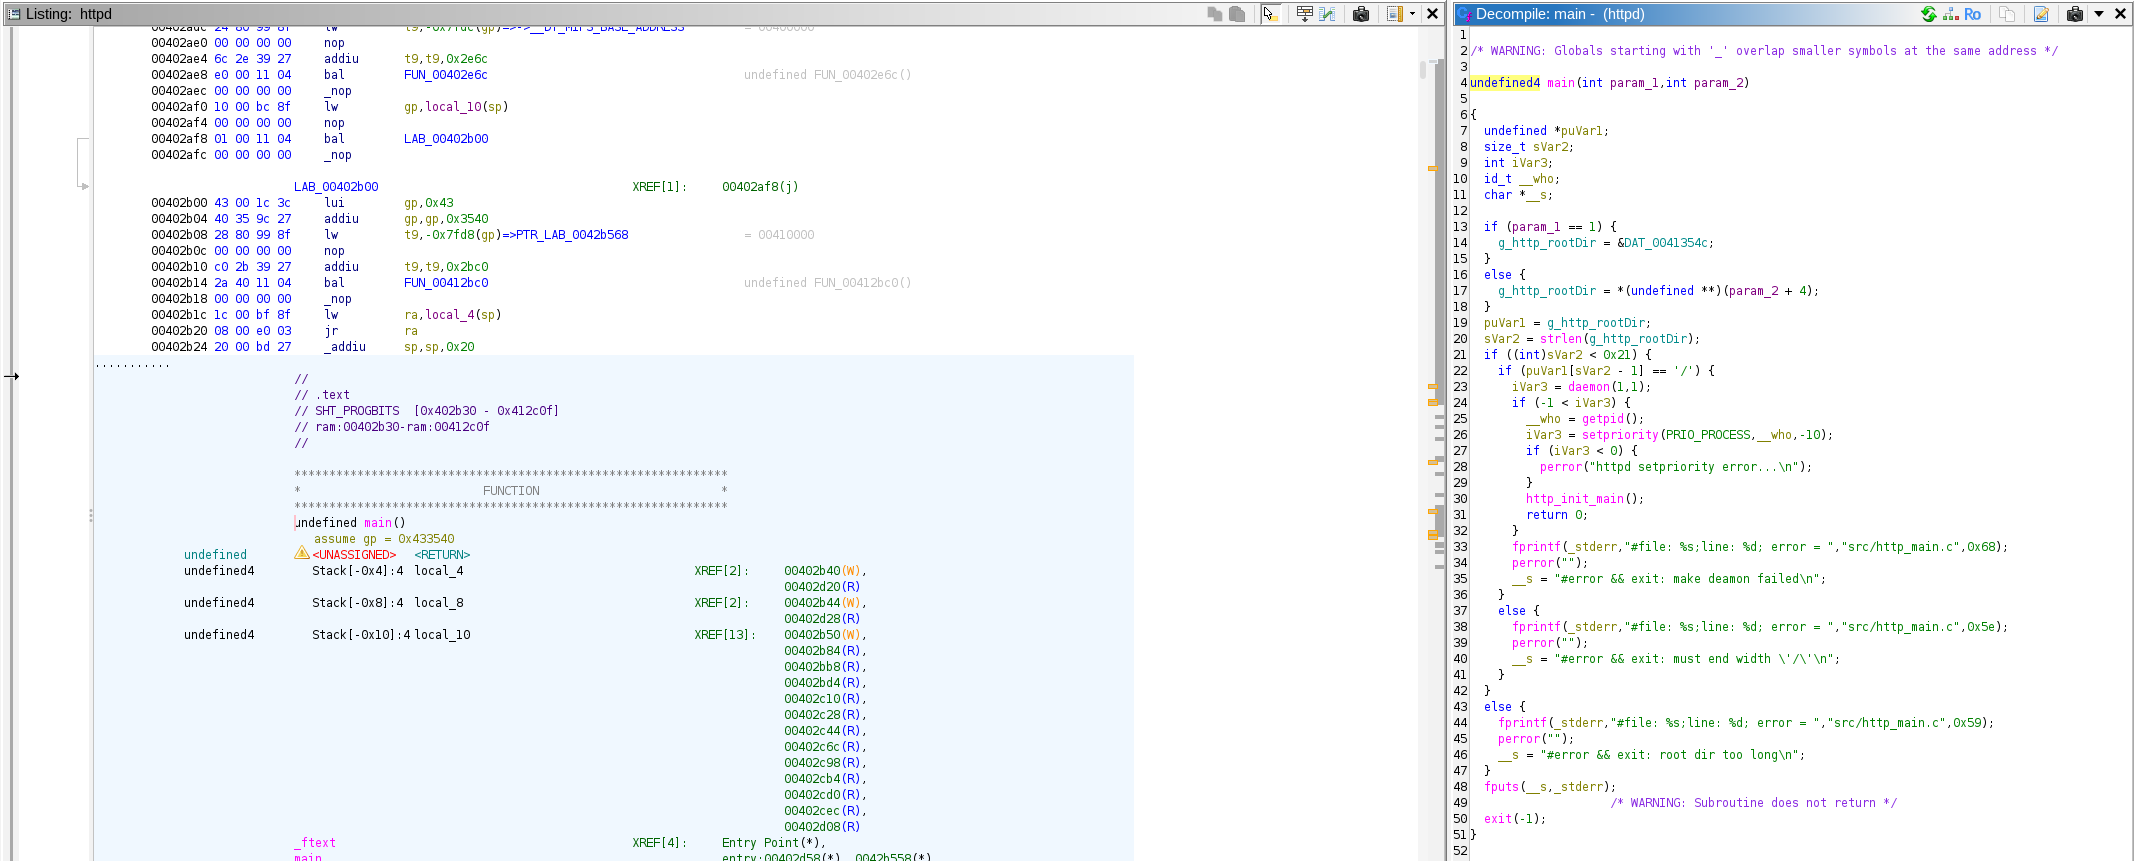
We have multiple places that we should consider: /usr/bin/httpd This binary corresponds to working internally with a web service, which gives admin control, and also /etc/init.d/rcS An initial script that runs scripts and initialises the router to run correctly.
Emulating Firmware with QEMU
Probably, more people say that emulating is not that hard, it seems to be; it is like “just emulating with QEMU”, I assure you, it is more complicated than you think. Let’s show it step by step
What Is QEMU?
QEMU (Quick Emulator) is an open-source machine emulator and virtualizer that runs software designed for one hardware architecture on a completely different system. Unlike traditional virtual machines that rely on the host CPU’s native instructions, QEMU can fully emulate processors such as ARM, MIPS, PowerPC, x86, RISC-V, and more. This makes it invaluable when analyzing embedded devices, whose firmware often targets architectures your laptop or server does not natively support.
Under the hood, QEMU translates guest-architecture instructions into host instructions using a dynamic binary translator, in other words, JIT. It also emulates memory, peripherals, storage devices, and network interfaces, providing enough of a “fake hardware environment” for many operating systems (including embedded Linux-based firmwares) to boot.
Because QEMU is open-source, widely supported, and highly flexible, it has become the standard tool for researchers, reverse engineers, and security analysts working with embedded systems.
How to identify kernel version and architecture?
strings 10400 | grep Linux
Linux version 2.6.36 (jenkins@sohoicilinux4) (gcc version 4.6.3 (Buildroot 2012.11.1) )
By strings and grep We get the exact version of Linux. The next step is to identify the architecture to emulate precisely.
By the file command, we get all the information about the file
file bin/busybox
bin/busybox: ELF 32-bit LSB executable, MIPS, MIPS32 rel2 version 1 (SYSV), dynamically linked, interpreter /lib/ld-uClibc.so.0, stripped
file usr/bin/httpd
usr/bin/httpd: ELF 32-bit LSB executable, MIPS, MIPS32 rel2 version 1 (SYSV), dynamically linked, interpreter /lib/ld-uClibc.so.0, stripped
You can download all the necessary images from these sources:
wget https://people.debian.org/~aurel32/qemu/mipsel/debian_wheezy_mipsel_standard.qcow2
wget https://people.debian.org/~aurel32/qemu/mipsel/vmlinux-2.6.32-5-4kc-malta
wget https://people.debian.org/~aurel32/qemu/mipsel/vmlinux-3.2.0-4-4kc-malta
When emulating router firmware, QEMU becomes the bridge between embedded hardware and your analysis environment. A command like the one below may look dense, but its structure is simple once you understand the role of each component:
sudo qemu-system-mipsel \
    -M malta \
    -kernel vmlinux-2.6.32-5-4kc-malta \
    -hda debian_squeeze_mipsel_standard.qcow2 \
    -append "root=/dev/sda1 console=ttyS0 nokaslr" \
    -net nic,model=e1000 \
    -net user,hostfwd=tcp::8080-:80,hostfwd=tcp::8443-:443,hostfwd=tcp::2222-:22 \
    -nographic \
    -m 256M
At its core, this command tells QEMU to boot a little-endian MIPS system using the Malta reference board, a platform that Linux kernels support extremely well. The supplied vmlinux file is the compiled kernel that will run inside the emulator, while the QCOW2 disk image acts as the virtual machine’s storage. I depends, also an initial RAM disk Image (initrd).
Boot arguments define how the system starts:
root=/dev/sda1points the kernel to the root filesystem,console=ttyS0ensures all output goes to the serial console,nokaslrdisables memory randomization for easier debugging.
Networking is handled through a virtual Intel e1000 NIC, paired with QEMU’s user-mode network stack. Port forwarding allows convenient access to services inside the VM from your host, HTTP on port 8080, HTTPS on 8443, and SSH on 2222. Running with -nographic drops the graphical window entirely and gives a pure serial terminal, which is precisely how most embedded systems communicate. Memory is capped at a lightweight 256 MB, keeping the environment realistic for router-class hardware.
With just these flags, QEMU transforms into a fully functional MIPS test bench, perfect for firmware analysis, service emulation, and controlled experimentation without touching the actual device.
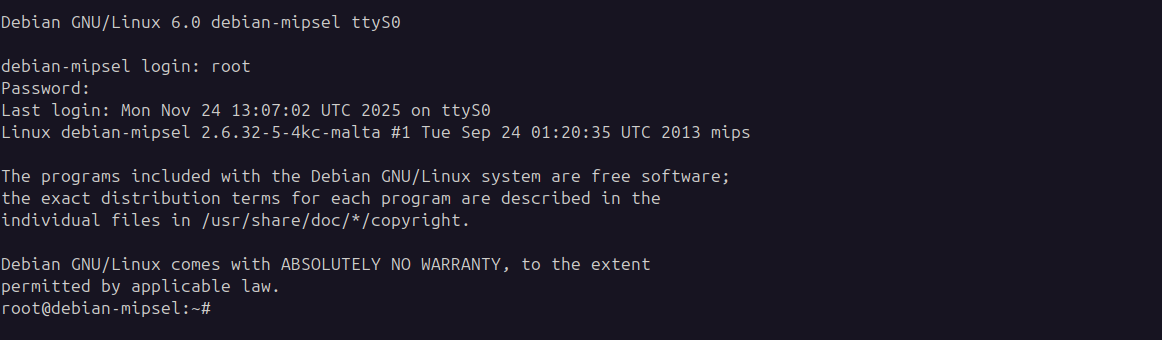
As shown in the screenshot, we enter with credentials root:root
Of course, there is nothing, because we didn’t transfer any files from our userland squashedfs to QEMU.
Directly emulating separate parts of firmware
In rare cases, you can emulate binary (extracted firmware) itself, if it doesn’t have dependencies that require unique libraries or environment, by the command:
# Run binaries directly with qemu-mipsel-static
qemu-mipsel-static -L squashfs-root/ squashfs-root/bin/sh
# $ echo "worked"
# worked
# Or for specific programs, in rare cases works, in our case not
qemu-mips-static -L squashfs-root/ squashfs-root/usr/sbin/httpd
Ways to move files from the Host to the VM.
Unfortunately, you can’t drag and drop files like in VirtualBox or VMware. In QEMU, you have several safe ways of moving files into a VM.
Port-forwarded SSH
One of the safest and easiest ways of moving files is via SSH.
First, make sure you forwarded the port from the VM to the HOST with the right flag:
-net user ... hostfwd=tcp::2222-:22
And with the command, you can connect to SSH:
ssh -p 2222 root@localhost -o HostKeyAlgorithms=+ssh-rsa
And with the command, we move all files:
scp -r -P 2222 -o HostKeyAlgorithms=+ssh-rsa /home/somename/Projects/router/tplink/_firmware.bin.extracted/squashfs-root root@localhost:/root/firmware/
Before running the rcS or httpd
Using 9p Filesystem (Shared Folder)
This is the configuration of script.
qemu-system-mipsel \
    -M malta \
    -kernel vmlinux-3.2.0-4-4kc-malta \
    -append "nokaslr root=/dev/sda1" \
    -hda debian_wheezy_mipsel_standard.qcow2 \
    -virtfs local,path=/path/to/squashfs-root,mount_tag=host0,security_model=passthrough,id=host0 \
    -net nic -net user \
    -nographic
-virtfs local,path=/path/to/squashfs-root,mount_tag=host0,security_model=passthrough,id=host0 \
And inside the QEMU:
mkdir /mnt/host
mount -t 9p -o trans=virtio,version=9p2000.L host0 /mnt/host
cp -r /mnt/host/* /tmp/firmware/
Note: This method isn’t supported by the Kernel version currently used in our testcase; it’s intended for a more modern Kernel version.
Attach Firmware as Second Disk
Create a disk image with your firmware
dd if=/dev/zero of=firmware.img bs=1M count=200
mkfs.ext4 firmware.img
Mount and copy firmware
sudo mkdir -p /mnt/firmware-disk
sudo mount firmware.img /mnt/firmware-disk
sudo cp -r squashfs-root/* /mnt/firmware-disk/
sudo umount /mnt/firmware-disk
Start QEMU with the firmware disk attached
sudo qemu-system-mipsel \
    -M malta \
    -kernel vmlinux-3.2.0-4-4kc-malta \
    -append "nokaslr root=/dev/sda1" \
    -hda debian_wheezy_mipsel_standard.qcow2 \
    -hdb firmware.img \
    -net nic -net user \
    -nographic
Preparing the environment for emulation
Before starting the VM, we must prepare the host networking so that QEMU can communicate with the local machine. QEMU interacts with the host through TUN/TAP interfaces, where /dev/net/tun is exposed as a file descriptor and tap0 behaves like a virtual NIC attached to the host network stack. To support this, we create a bridge interface (br0) on the host, then connect both the host NIC and the TAP interface to it.
sudo apt-get install bridge-utils
sudo apt-get install uml-utilities
Set up the bridge and attach your physical interface (replace eno2 with your actual NIC):
ifconfig eno2 down
brctl addbr br0
brctl addif br0 eno2
brctl stp br0 on
brctl setfd br0 2
brctl sethello br0 1
ifconfig br0 0.0.0.0 promisc up
ifconfig eno2 0.0.0.0 promisc up
dhclient br0
You can verify the bridge using:
brctl show br0
brctl showstp br0
Next, create and configure the TAP interface:
tunctl -t tap0
brctl addif br0 tap0
ifconfig tap0 0.0.0.0 promisc up
ifconfig tap0 192.168.1.1/24 up  # subnet
Recheck the bridge status:
brctl showstp br0
With this networking setup in place, QEMU can attach the firmware’s virtual NIC to tap0, enabling real interaction between the emulated router and your host system, just like the physical router would behave on your network.
And inside the VM, you need to assign an IP address manually if DHCP doesn’t assign one.
brctl addbr br0
ifconfig br0 192.168.1.x/24 up # x should be in subnet
If we open the firmware folder, which was transferred in /root/firmware in VM. We have found that all folders have been fully transferred. Next, we must bind-mount the VMs /proc, /dev, and /sys directories into the extracted firmware’s filesystem.
mount -o bind /proc proc/
mount -o bind /sys sys/
mount -o bind /dev dev/
Once those system paths are mapped correctly, we can switch into the firmware environment using chroot
chroot squashfs-root/ /bin/sh
You probably think it is all good, and we are ready to run the script from /etc/init.d/rcS . And we can move into /etc/rc.d or /etc/init.d and manually launch the relevant startup scripts to bring up userland services. It’s essential to thoroughly examine the contents of the rcS directory. BUT, it fails.
Every firmware behaves differently; these scripts often require adjustments to account for missing network devices, broken NVRAM calls, and other quirks. Sometimes you will spend weeks emulating properly. And in the process of searching for the solutions to your bugs, you hit the GitHub issues, where they have already been discussed, and they have been resolved. And for yourself, you discover a couple of excellent tools that can partially emulate your firmware.
Firmadyne
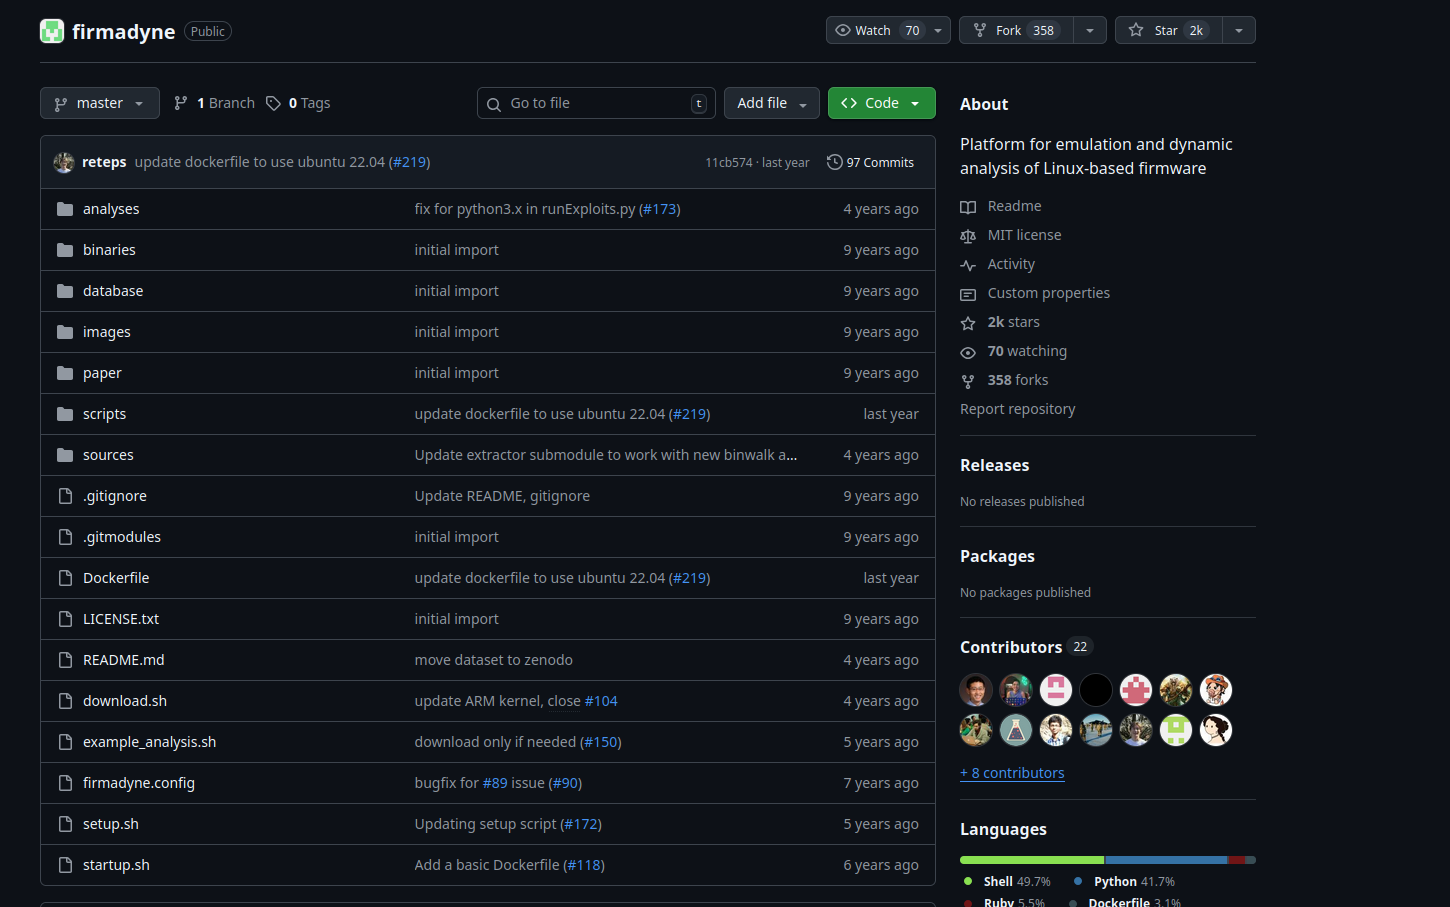
Firmadyne can be incredibly helpful when everything lines up. It’s an automated framework designed to emulate Linux-based device firmware and supports both MIPS and ARM architectures. The tool handles root filesystem extraction, guesses network interfaces, constructs a QEMU disk image, and even emulates NVRAM behavior.
If you’re approaching a new firmware target and want full-system emulation, Firmadyne is worth trying first. You can patch some of its quirks or errors before resorting to manual emulation methods. One thing to note: newer QEMU versions sometimes cause unpredictable issues. Running Firmadyne inside Docker typically bypasses these compatibility problems.
ARM-X
ARM-X is another firmware emulation toolkit, but specifically focused on ARM-based devices. It bundles together a set of kernels, scripts, and prepared filesystems to help boot ARM firmware inside QEMU. The framework also includes several sample configurations you can use as starting templates for different devices.
Emulating TP-Link Router Firmware with Firmadyne
Firmadyne automates router firmware emulation by handling extraction, architecture detection, kernel selection, and network setup automatically. Here’s the corrected workflow.
Quick Setup
Install dependencies and clone Firmadyne
# Install required packages
sudo apt-get update
sudo apt-get install -y busybox-static fakeroot git dmsetup kpartx netcat-openbsd \
    nmap python3-psycopg2 python3-pip snmp uml-utilities util-linux vlan \
    qemu-system-arm qemu-system-mips qemu-system-x86 qemu-utils postgresql

cd ~
git clone --recursive https://github.com/firmadyne/firmadyne.git
cd firmadyne
Database Configuration
Create a PostgreSQL user and database (Password: firmadyn)
sudo -u postgres createuser -P firmady
sudo -u postgres createdb -O firmadyne firmware
sudo -u postgres psql -d firmware < ./database/schema
Configure Firmadyne paths:
nano firmadyne.config
FIRMWARE_DIR=/home/yourusername/firmadyne/
Download Pre-built Kernels
cd ~/firmadyne
./download.sh
Extract and Emulate Firmware
Extract firmware filesystem:
python3 ./sources/extractor/extractor.py -b Netgear -sql 127.0.0.1 -np -nk \
    "TL-WR841Nv14.bin" images
Identify architecture
./scripts/getArch.sh ./images/1.tar.gz
Store filesystem in database
./scripts/tar2db.py -i 1 -f ./images/1.tar.gz
Create QEMU disk image:
sudo ./scripts/makeImage.sh 1
Infer network configuration and run the emulation
./scripts/inferNetwork.sh 1
sudo ./scratch/1/run.sh
Understanding the Scratch Directory
After running makeImage.sh, Firmadyne creates a scratch directory with your image ID. The structure looks like:
firmadyne/
├── scratch/
│   └── 1/              # Your image ID
│       ├── run.sh      # Script to run emulation
│       ├── image.raw   # QEMU disk image
│       └── ...
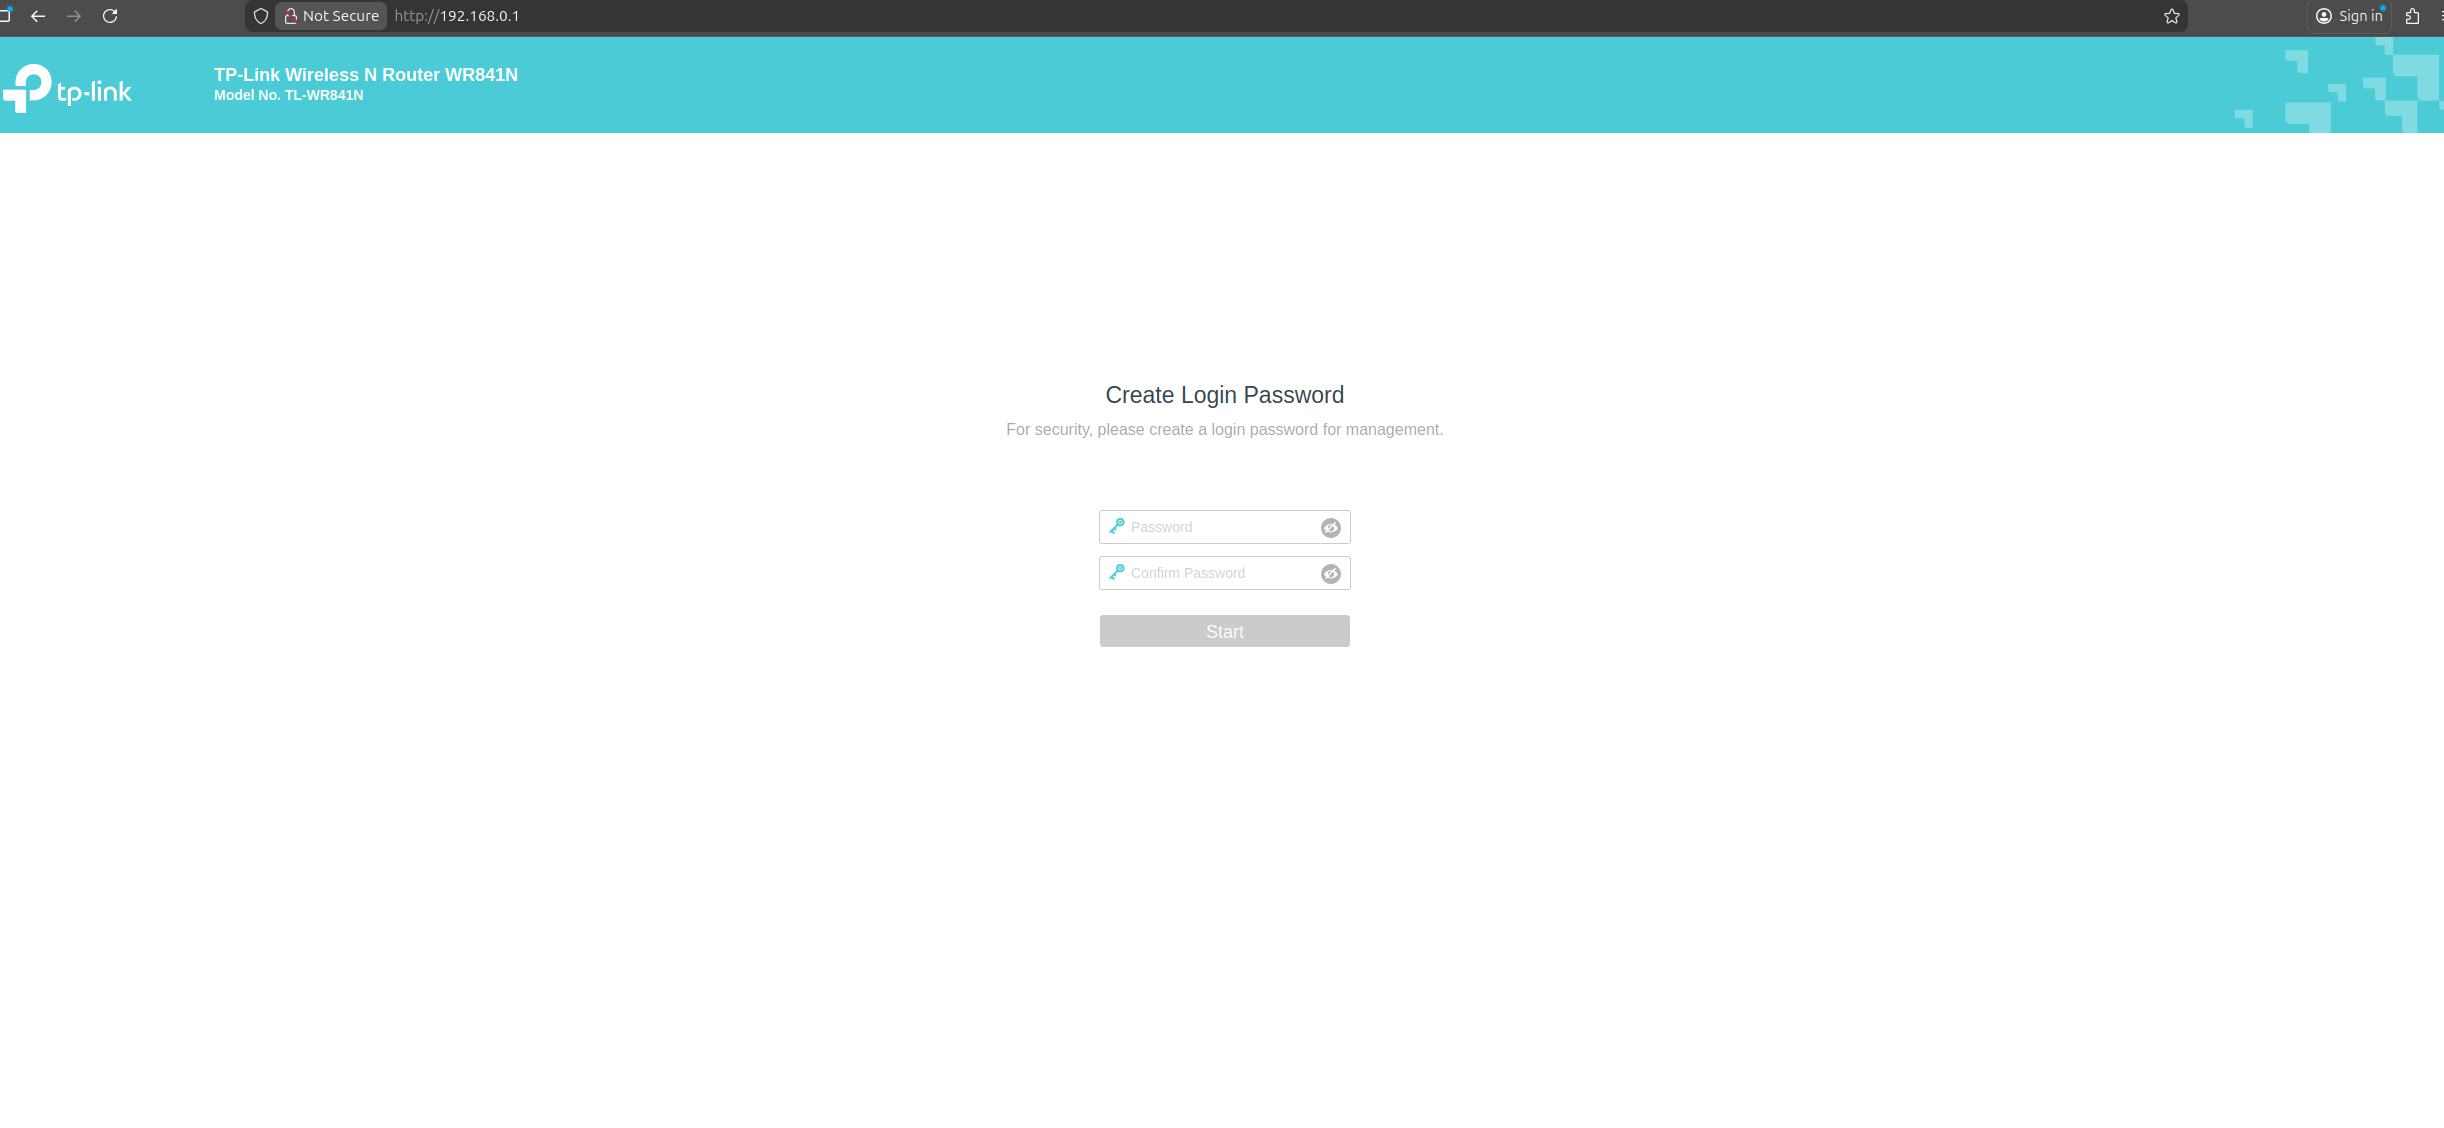
Accessing the Emulated Router
After running sudo ./scratch/1/run.sh, the output shows the network configuration:
IP Address: 192.168.0.1
Web Interface: http://192.168.0.1
From another terminal, check if it accesable:
ping 192.168.0.1
curl http://192.168.0.1
Alternative if fails: Using FirmAE
FirmAE is an enhanced version that works better with modern firmware Clone, Install, and Run:
# Clone FirmAE
git clone --recursive https://github.com/pr0v3rbs/FirmAE.git
cd FirmAE

# Install (handles all dependencies)
./install.sh

# Run firmware (single command does everything)
./run.sh -r ~/TL-WR841Nv14_US_0.9.1_4.19_up_boot[250328-rel51324]_2025-03-28_14.16.58.bin
Troubleshooting
If scratch directory is not created:
# Check if makeImage.sh succeeded
ls -la scratch/

# Check database for image
psql -U firmadyne -d firmware -c "SELECT * FROM image;"

# Manually check if tarball exists
ls -la images/
If network is not accessible:
# Check TAP interfaces
ip addr show | grep tap

# Check if QEMU is running
ps aux | grep qemu

# View network config from inferNetwork.sh output
cat scratch/1/network.txt
If extraction fails:
# Manually extract with binwalk
binwalk -e TL-WR841Nv14*.bin

# Create tarball manually
cd _TL-WR841Nv14*.extracted
tar -czf ../manual.tar.gz squashfs-root/

# Use manual tarball
mv manual.tar.gz ~/firmadyne/images/1.tar.gz
Complete Workflow Example
cd ~/firmadyne

# Extract (note the ID in output)
python3 sources/extractor/extractor.py -b TPLink -sql 127.0.0.1 -np -nk \
    "TL-WR841Nv14.bin" images

# Assuming ID is 2
./scripts/getArch.sh ./images/2.tar.gz
./scripts/tar2db.py -i 2 -f ./images/2.tar.gz
sudo ./scripts/makeImage.sh 2
./scripts/inferNetwork.sh 2

# Run emulation
sudo ./scratch/2/run.sh

# In another terminal, access router
firefox http://192.168.0.1
- extractor.py: Extracts filesystem using binwalk and creates tarball in
images/ - getArch.sh: Identifies processor architecture (mips, mipsel, armel)
- tar2db.py: Loads filesystem metadata into PostgreSQL database
- makeImage.sh: Creates QEMU bootable disk image in
scratch/ID/ - inferNetwork.sh: Analyzes network configuration and creates network setup
- run.sh: Launches QEMU with proper kernel, network, and disk configuration
The key difference from manual QEMU setup is that Firmadyne automates kernel selection, network bridge creation, and generates the complete QEMU command based on detected firmware characteristics. And finally we got our emulation:
And also, we can freely reverse binaries from firmware in Ghidra